
[StreamTube] Video Advertising
Since version 2.7.2, if you’re seeking a straightforward method to display ads on all videos, you can set a global Ad Tag by navigating to Customize > Theme Options > Advertising section.
To enable the display of custom ads, it is essential that your WordPress website is equipped to support an HTTPS connection. Additionally, the activation of CORS (Cross-Origin Resource Sharing) is a prerequisite by adding the following rules to the beginning of the htaccess file.
# BEGIN Advertising
# The directives (lines) between "BEGIN Advertising" and "END Advertising" are
# dynamically generated, and should only be modified via WordPress filters.
# Any changes to the directives between these markers will be overwritten.
<ifmodule mod_headers.c="">
Header set Access-Control-Allow-Origin "*"
Header set Access-Control-Allow-Credentials true
</ifmodule>
# END Advertising
OR:
# BEGIN Advertising
# The directives (lines) between "BEGIN Advertising" and "END Advertising" are
# dynamically generated, and should only be modified via WordPress filters.
# Any changes to the directives between these markers will be overwritten.
<ifmodule mod_headers.c="">
    Header set Access-Control-Allow-Origin "https://imasdk.googleapis.com"
    Header set Access-Control-Allow-Credentials true
</ifmodule>
# END Advertising
The display of ads might be influenced when an adblocker is activated.
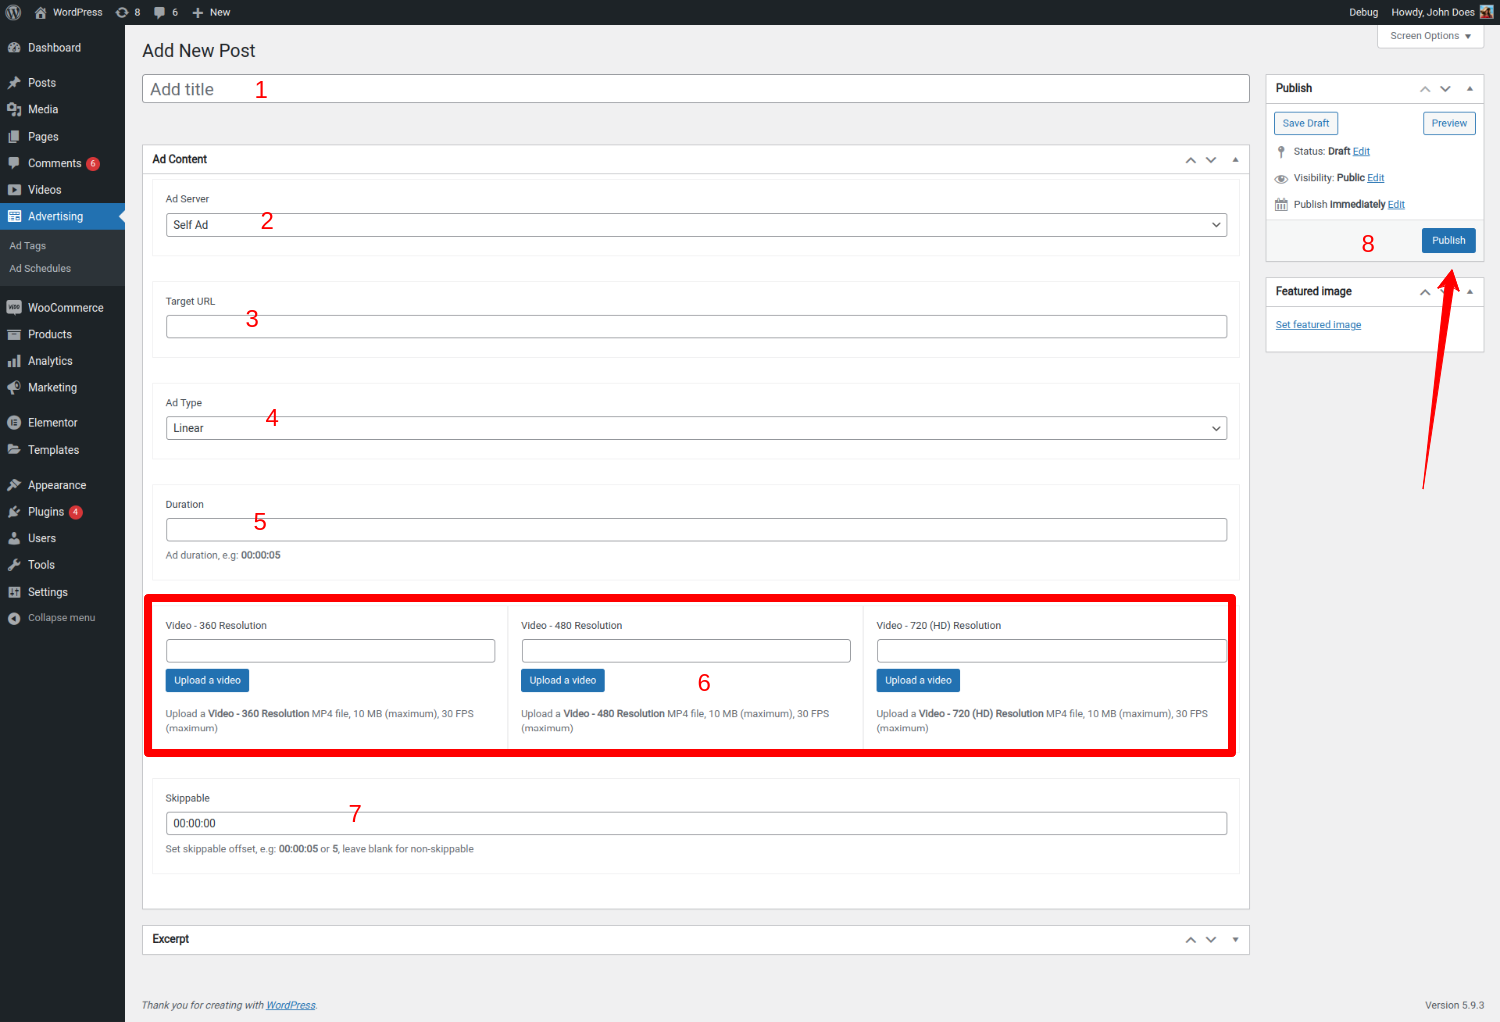
Add AdTag
Navigate to Advertising > Ad Tags > Add New
- Add Title: Enter a custom title
- Ad Server: Select the Ad server you want to run:
- Self Ad: run your own Ad, video and image media types are supported.
- VAST-compliant Ad Server: run Ads from another Ad server such as Google Ad Manager, Google AdSense network, or any VAST-compliant ad server.
- Target URL: Set a custom target URL which will be opened when clicking on the Ad, this option only supports Self Ad
- Ad Type: Linear or NonLinear
- Duration: Duration of your video Ad
- Upload your own video files from WordPress media, multiple resolutions are supported
- Skippable: Allow viewers to skip ads after x seconds
- Save changes
You can create many ad tags as you wish with different content
Custom Image Ad
Custom Image and Video Ad
Import custom Vast Tag
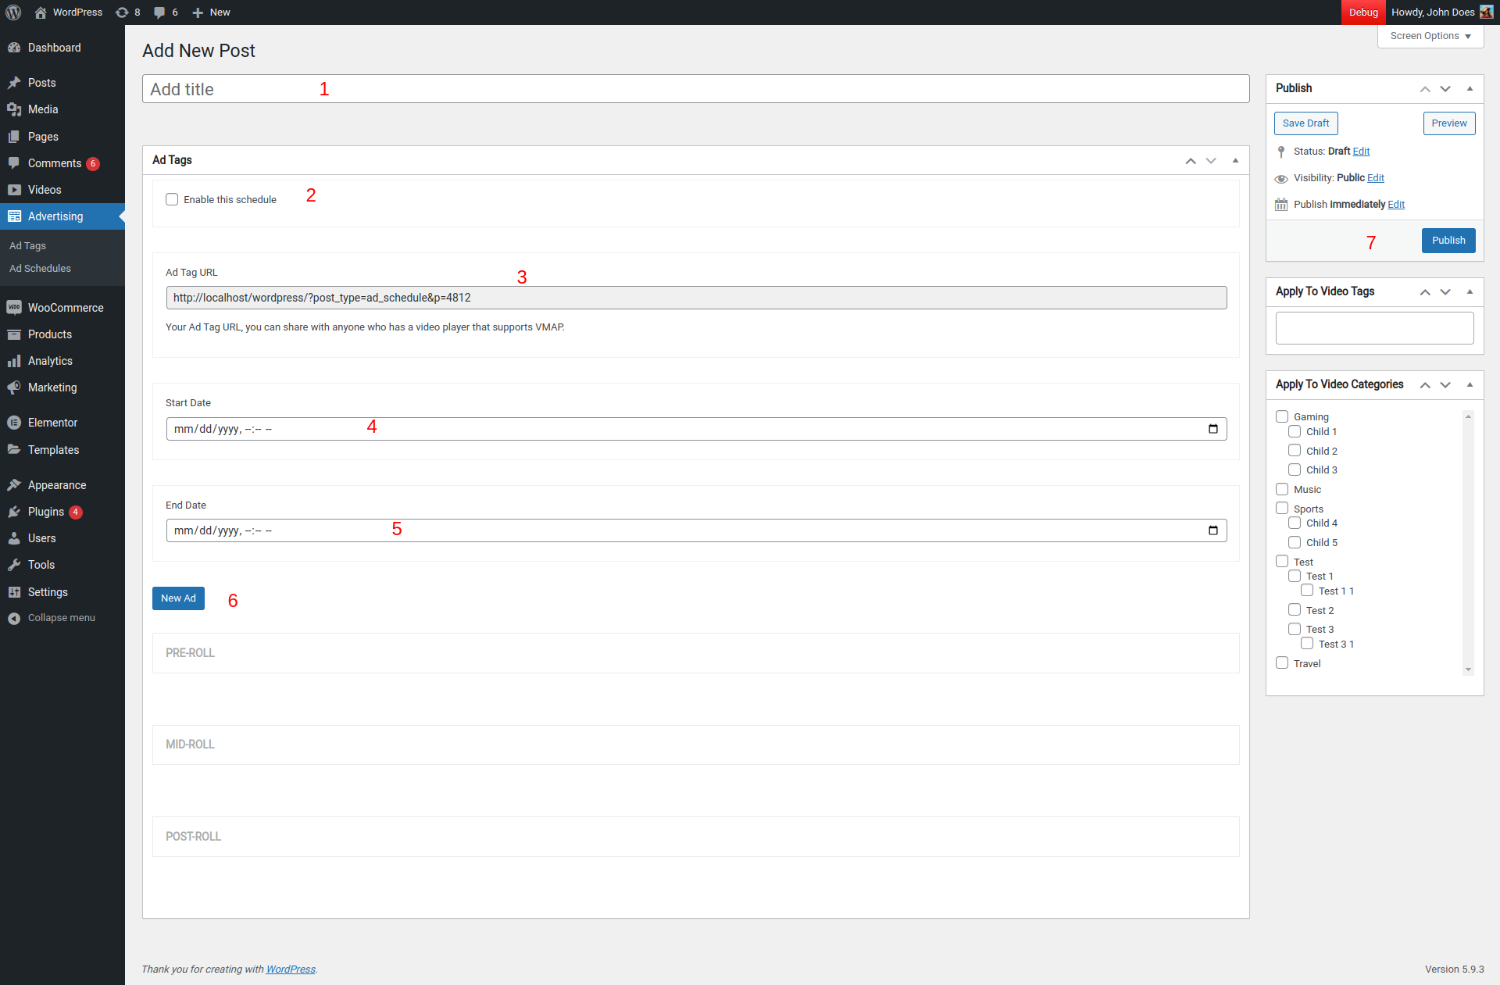
Add Ad Schedule
Navigate to Advertising > Ad Schedules > Add New
- Add Title: Enter a custom title
- Enable this Schedule: check on this option to enable Ad schedule, otherwise, Ad schedule won't work.
- Ad Tag URL: your own Ad Tag URL, try to open this URL on browser, if you get an 404 error page, you will need to navigate Settings > Permalinks page and hit the Save Changes button to update permalinks, please note that you have to update the Ad Schedule before opening this URL
- Start Date: Date to start the schedule, required
- End Date: Date to stop the schedule, required
- New Ad: Add the ad tags that you added earlier, you can also select Pre-roll, Mid-roll or Post-roll while adding Ad tag
- Save changes
Set Ads For Special Videos
Edit the video you want to set Ads for
- Disable Advertising: Don't run any Ads on this video content
- Ad Schedules: Select the Ad Schedules you want to run on this video content

Advertisements will not appear if:
The current logged-in user is an admin, editor, or the video owner.The current logged-in user has paid for the video content or holds a membership level associated with the video.- CORS isn't enabled.
- A browser adblocker is enabled.